Image Hosted by ImageShack.us Image Hosted by ImageShack.us Image Hosted by ImageShack.us Image Hosted by ImageShack.us Image Hosted by ImageShack.us

Sunday, October 31, 2010

Lucie's stamp storage


I received a few weeks ago this submission by Lucie. I love it, it is crafty in more ways than one as it recycles a craft product. This is what Lucie has to say:
I try to give a second life to stuff that would usually go to the recycle bin.  In this case, I used the 12x12 packaging from Fancy Pants (the one you buy felt or stamps in) and put my stamps in it.  I punched 3 holes and placed them in a 12 x 12 3-ring binder.  I love this storage because I don't loose any stamps. 
Check here her blog post

Friday, October 29, 2010

A tour of Jennifer Ellefson's Creative Space

Jennifer Ellefson has posted a tour around her beautiful craft space


I love the all the white - isn't it peaceful, just perfect to be creative in.


Jenn's main desk area - and in her own words "I like having things within reach, so there are lots of neat little storage options. It all appears to go together, but in reality, it doesn't! ;) I just keep my eyes peeled for good storage pieces, preferably those that go vertical with a small footprint so as not to take up too much space on the surface. If it isn't the right color, I usually just paint it!"

And a second work surface holds her sewing machine, die cut machine and copics


And a closer pic of her copic storage


To see more photos of Jenn's craft space click here, or here for the main page of her blog.

Wednesday, October 27, 2010

Michelle's craft room

Take a look at Michelle's craft room


I love the clean and simple look and all that hidden storage.


For more pictures and ideas please stop by her blog The Card Grotto and scroll down the right hand side to find the link to her craft room pictures.

Monday, October 25, 2010

Joy's studio

y

Joy's studio is full of DIY ideas that are really good. For part two of the video tour click here. And click here to go directly to Joy's Blog main page. She is a very talented cardmaker so it is well worth a visit.

Saturday, October 23, 2010

Karin's Scraproom


Recently Karin finished her scraproom in her new house. Her room is so well organized!
I love the labels she maid for the plastic boxes. For more information visit her blog: Karin's Scrablog.


Thursday, October 21, 2010

Dawn's studio


I love Dawn's studio because she has worked on some of the units to make them fit with the color scheme. And she has so many more ideas on her studio that is worth a detailed look over at her blog. Click here!

Tuesday, October 19, 2010

Sunday, October 17, 2010

Tracey's Cricut Cartridge storage idea


Tracey came up with a storage solution for her Cricut cartridges, overlays and the manual.    Tracey does the majority of her scrapbooking at crops and she like to have her Cricut available with her.  But with almost 50 cartridges it takes up a ton of space.  She came across a photo box at Micheals and started thinking.  Using the cardboard backing from a paper pack, Tracey made little trays to hold the cartridges and two stack on top of each other perfectly to fit in the back of the photo box.  Tracey tucked the overlays into the front of the manual and now can have 24 cartridges in one photo box.  A perfect little box to take to a crop!!


Friday, October 15, 2010

Dawn's metal die storage

Metal dies are all the rage, and the storage of those dies is a hot topic here at Crafty Storage.

Dawn over at My Favorite Things has a great idea for DIY die storage. And it's eco-friendly too!

She used a cardstock, leftover acetate sheets, and her sewing machine to create these simple and yet very practical die storage pockets!
(photo courtesy of Dawn at My Favorite Things)

Each die slips easily into the pocket, but is easy to see (thanks to the acetate). And if you read Dawn's blog, you'll know that a plain plastic basket won't do to store all the pockets - Dawn loves vintage, and has an amazing eye for style and colour (note how the colours of the cardstock coordinate with her blog!) - so she stores them in a vintage loaf pan. Cute and simple!

(photo courtesy of Dawn at My Favorite Things)

It's obvious how well this solution works with solid, larger dies, but it can be easily adapted to work with smaller dies (use a smaller piece of acetate) long, skinny dies (sew the pocket down the middle to hold two on one card), and even multiple stacked dies like Nestabilities (cut a thin magnetic sheet to hold the dies together and then slide it into the pocket.)

Check out Dawn's blog for more details on how she created the pockets. Love this idea? Let us know if you try it out, or if you have your own way to store metal dies (or other crafting tools.) We'd love to hear from you!

Posted by Jessica

Wednesday, October 13, 2010

Amy's loose ribbon storage

Amy over at Prairie Paper and Ink has a great idea for storing loose ribbon. Here's Amy explaining it, in her own words.


You can also see the original post on her blog.

Posted by Jessica

Monday, October 11, 2010

gm glimmerglass Studio

Oh my goodness golly. When I first saw the AMAZING studio over at gm glimmerglass, I was stunned. Speechless, really.
(photo courtesy of gm glimmerglass)

We all love to keep our crafty areas organized, but that often turns into a very practical decor. Lots of drawers and plastic and labels. That often clashes with our sense of colour, space, and aesthetics. Genevieve has found the best of both worlds, weaving soft colours, lots of texture, and most of all, warmth into her craft studio.(photo courtesy of gm glimmerglass)

In her own words:

"Working in a little shoebox of a studio, I try to maximize every inch of space while keeping things visually clear. I've kept the walls "very vanilla" which provides me with a calm surround for some of the eye-popping, intensely colored artwork that comes outa here."
(photo courtesy of gm glimmerglass)

Hop over to Genevieve's blog to see all the photos, and hear more about her amazing room! There are two posts: Let's Get this Party Started and Zoom and Enhance. Look for her cool marker storage idea and don't miss Godzilla wearing pearls! :D

Posted by Jessica

Saturday, October 09, 2010

Moline's Craft Room

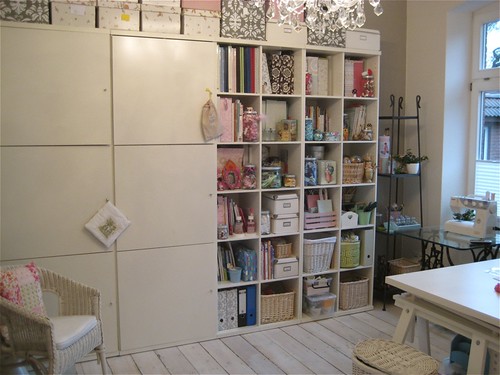
Moline has a great Craft Room full of floor to ceiling storage studio
I love how the white background makes all the fun colors pop! Haberdashery shelves
She keeps most of her materials in boxes, I love having a basket on the worktable (and a clear worktable at that! Lots of sun peekeing trough the window too.
Pauline working

Here's a link to Moline's Studio full set on Flikr, so you can browse around:

Thursday, October 07, 2010

Marie's Embossing Folder Storage

Storage - it's one of the biggest issues I have with papercrafting and all it's tools!

The other day I wanted my Swiss Dots Cuttlebug embossing folder and it took me 20 minutes to find it!

So I found a little mini milk crate (used for CD storage) and labelled my folders with a Sharpie marker.

I then alphabetized them by Designer.

Check this out:


Yes I know the folder names appear upside down - or so it would seem - but when I'm using them in a class or for a demo they are right side up. 

Besides I can read them easily if I position myself over the crate while I flip through them!

This works for me - maybe it will work for you too!

Posted by Marie

Tuesday, October 05, 2010

Shirley's Promarker/Copic idea


Shirley's idea is superb. Funnily enough I always glanced over this Ikea DVD storage rack, but never quite figured what they could be useful for apart from the obvious DVDs. 
Shirle's husband made her this Promarker/Copic cabinet. He cut the trays into 3 and this is what he made. It measures 14" wide and 11" high.

Sunday, October 03, 2010

Mari's die and embossing folders idea


Mari's idea involves thick page protectors and altered them to fit my embossing folders/dies/nesties.


Great idea, if you ask me!
Click here for the full post.

Friday, October 01, 2010

About Maria's Ribbon Storage System


Thank you for all your reactions on my post Maria's Studio. Some of you have some questions about my ribbon storage system. I hope this will answer your questions:

* The wooden ribbonholders are from Kaiser Craft. I checked the website I found them at the mini-books section of beyond the pages (not at the storage section). The article number is SB134.


* I use pins to hold the ribbons in place.

* The wall storage systems are from Ikea. I used "Bygel", but Ikea got more different kitchen wall storage systems.

LinkWithin

Related Posts Plugin for WordPress, Blogger...