Image Hosted by ImageShack.us Image Hosted by ImageShack.us Image Hosted by ImageShack.us Image Hosted by ImageShack.us Image Hosted by ImageShack.us

Wednesday, January 20, 2010

Craft room inspiring my own renovation.


My name is Christy and I'm happy to be contributing to Crafty Storage. I am currently in the midst of a craft room overhaul. After many moves and accumulation it is time. In doing research for my "remodel" I cam across Crafty Storage as well as many others. I hope my findings along my own task will help others.


One craft room that has already been featured, but deserves to be revisted belongs to Amanda. From her custom desk and shelving to use of purchased drawer sets, Amanda has thought of just about everything. I can only dream that when I'm done my studio will resemble even 10% of what she has accomplished here. The picture above is the most recent, taken just last week. Check out her blog and tour of her Scraproom. I just can't get over how she has her paper organized and well kept. Just like in a store... This will be my first assignment for my own room.


Check back for more ideas. I hope to have some before and after photos of my own craftroom soon.

Tuesday, January 19, 2010

Valentine's Studio Space

Hi! I'm Dawn and I'm really excited to be contributing to the Crafty Storage Blog.

My first post is my friend's Clair and Sharni's fabulous craft space, they recently posted a tour on their blog.


Since then Clair has also posted about her nifty punch storage and her nestability storage.

I can't believe how they manage to keep their craftroom so tidy - all the time! It must be the organisation!

To see the tour of their craftroom click here, to find out more about Clair's punch storage click here, and see her nestability storage click here.

.

Monday, January 18, 2010

round & round...

While doing anything crafty, I often find myself struggling to have all necessary supplies within reach.  So, I had to get a little creative (although, I'm fairly certain there are others who have successfully completed this task as well).


I decided that this plan would be best used inside my classroom...with a home version soon to follow.  As a 7th grade language arts and social studies teacher, I'm constantly using my colored pencils, markers, scissors, etc.  You'll also notice a gavel (I teach the Leadership/ASB class), some hand sanitizer, a few numbered popsicle sticks, and Smencils.  Some of these items are not all that similiar to what you might find in your own crafting stash.  No worries.  It should work just the same.


All you need is one Lazy Susan, and a few containers that will fit atop your spinning wheel.  Next up, grab your glue gun and turn it on.  While you're waiting for it to heat up, arrange your containers (you can even trace them on the surface of your Lazy Susan).  Now it's time to glue it all down.  From there, all you've got left to do is fill the containers with your favorite crafting supplies!  Be sure you spin the Lazy Susan...just because you can!  :)


P.S.  My name is Anne and I'm soooooooooooo excited to be a part of this Crafty Storage team!  I hope to be back soon with more ideas to share.  Right now, we're in the midst of rearranging our spare bedroom/my crafting room.  Perhaps this blog will serve as a bit of a motivator for me too!

Sunday, January 17, 2010

Maria's Scrap Room

Hi, I'm Maria from The Netherlands and this is my first contribution for this great Craft Storage Blog. And this post is about my own craft space.

It's the cropcorner in my livingroom. I try to make the craftstorage a bit decorative and this are a few of my idea's:

Little buttons storage bought at the local flower shop:


Ribbons from KaiserKraft:


Desk organizers from Making Memories and Paper drawers from Kaisercraft:

More pictures are on my blog.

Craft room remodelling

For those of you out there who are lucky enough to have an entire room dedicated to crafting, the choices you make concerning furniture and storage are ones which you will consider for many, many hours if you are anything like me!

Julie featured on this blog several months ago, but she has recently moved into a larger craft room as she and her family added a conservatory to give her a studio for her card and craft classes. The first photograph shows her personal crafting space, with what looks like an impressive shopping haul of Ikea furniture! Ikea is a great place to buy furniture for your craft room, as it is relatively cheap and looks good too. The only drawback is assembling it yourself, my own experience suggests that it is best to tackle this alone where possible as too many cooks definitely spoil the broth when assembling Ikea furniture!

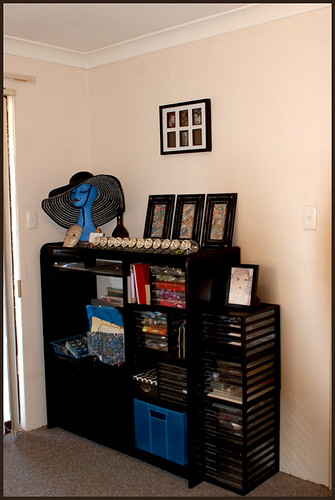
Julie has everything well organised, easy to reach and very tidy! She has used a combination of Ikea storage boxes and Really Useful Boxes, which fit perfectly within the units in her room. The expedit units seem to crop up again and again in craft room photographs on the internet, which just shows how well suited it is to the purpose.


If you would like to see more pictures of Julie's craft room and also her brand spanking new studio in the conservatoire (conservatory to the rest of us!!) then please visit her blog here.

Leave us a link if you've seen any interesting use of expedit units too please!

Saturday, January 16, 2010

Re-purpose a TV Cabinet

Hiya! I'm Bec and I've just joined the crafty storage blogging team. I thought it was only fitting that as my first contribution here, I should post a bit of a sneak peek at how I store and organise things.

I'm currently living in chaos - my fiance and I have just bought our first home and we're renovating the kitchen. So unfortunately, my craft room (aka the spare bedroom) is not as organised as it will be.

In my old house, I had a simple set up with lots of 'letter drawers', and old TV cabinet.

I found the TV cabinet worked quite well for small-space storage, and using it in my craft room saved it from going to the tip when we bought a larger tv.

Some of the benefits of using TV cabinet for craft storage
  • The TV opening has room for vertical paper storage in wire filing racks, for completed scrapbook albums or bigger projects.
  • The media shelves happened to fit my letter racks perfectly, but are adjustable to whatever height is required.
  • The shelf for a vcr or dvd player was great for storing my trimmer and sketch pads.
  • And the closed doors at the bottom hide a multitude of sins!

There are more pictures and a bit of an explanation on my blog, linked below.

Click here for more.

Great Studio Inspiration at Etsy Storque Blog

Check it out here.

Friday, January 15, 2010

Copic Markers storage


Tami had the concept and her husband engineered and produced it. They have launched a new business called Studio 3 Solutions. They hope to be add additional products.


It will hold a total of 120 Copic Sketch markers, with 24 on each shelf. Each shelf is angled so you can read the names on your sketch markers clearly. The angled shelf also allows you to pull a marker out without others coming along. It will also house the other styles of Copic markers, as well as most other coloring mediums, like Prismacolor colored pencils and markers.
Click here for Tami's blog.
You can also see a happy customer's review and photos on Heather Nichols' blog here.

Thursday, January 14, 2010

What's inside?

Hi! I'm Marie and I'm so excited to be contributing to the Crafty Storage Blog.

I've been crafting and organizing for ages!
I can't wait to show you some fun organizing and storage ideas.


Have you got drawers full of stuff? Of course you do that's why you're here!

I really like this idea of using a photo of what's inside and putting it on the outside for quick and easy access.

Here's where I keep my craft sponges:

The drawer on the left has string, hemp and twine and the drawer on the right has mini pens!

Note: These are drawer inserts that go in the Making Memories Embellishment Center.
Posted by Marie

Wednesday, January 13, 2010

Sandras Scrumptious Scraproom

Hi everyone, Jacque here. I'm so happy to be part of the Crafty Storage team. This is my first post and I hope I can give you all a little bit of inspiration.

This is a very dear friend of mine, Sandra and her Scrumptious Scraproom. This lady can turn your daggiest piece of furniture into a treasure for her scraproom.
These few piccys are from her old scraproom which you can find here. I just had to show you some of her awesome storage ideas from it :)


This was her old ribbon storage, wow :0


But now I really must show you all, her finished makeover. Isn't it just the most divine scraproom?? I know I'm very biased, but it is trully gorgeous mmmmmmm..........


Now if you would like to go check it out for yourself, then head over here to her blog and take a peek :)

I hope this gives you all a little inspiration and a few ideas :)
See you all soon xx

Tuesday, January 12, 2010

A week by week organizing guide

Hi all, I am so excited to be one of the Crafty Storage contributors and can not wait to share my finds with you! Now on to my first post.

For 29 weeks, Wookiemouse guided scrapbookers trough an Organize your Stuff Challenge, in which we overhauled our spaces and organized everything in them, she really thought of everything, from pictures and scraps to fonts on your computer and what to do when you don't have time to put your new stuff away....


Even though the challenge is over this is a great guide if you need to change your room or make your room, be sure to read the comments as they provide great solutions too.... She includes links to all the product she uses, photos of most of her before and afters and provides you with her 10 rules of organizing I highly recomend to print these and put them in every room that needs to be organized..


I learned a lot from this and will post how my room turned up in my next post sometime in February.
This is a link to the first post of the challenge


And here's the link to the main blog page

Monday, January 11, 2010

Wow!!!

What a response! Since I posted this entry a few days ago to request some contributors to form part of the Crafty Storage team I have had quite a few replies. Originally i was thinking to make a team of 5 contributors, but so many have replied that the team has increase to over twice that number. Hopefully it will mean that more post are going to go up every week. So in the next couple of weeks, the team will make their first contributions. I am sure you will like them!

Friday, January 08, 2010

Thank you

I have had a few requests about becoming Crafty Storage contributors, to be honest I would love a team of ten active contributors that can find ideas on the web or have them themselves and publish them in the blog.

If anyone wants to join the team email me (Paula Pascual) or send an email to craftystorageblog@googlemail.com. (The ones who have already applyed need not to worry.)

Wednesday, January 06, 2010

Copic Markers storage


This is how I store my markers, using an Acrylic Partition Desk Tidy from Muji. Several advantages. One of them is that you can store two ways: horizontal, perfect for one person, or upright for sharing.
The other main advantage is that you can store a couple -maybe more- on top of each other like above.


Monday, January 04, 2010

Annoucement

I am guessing that you have notice I haven't post anything for quite a while. truth be told, I am busier with my own blog and find little time for this one. But I do want to keep it up so maybe the best way to do so is to have a group of posters rather than just me.
So, any of you is interested in becoming part of the team just drop me a line!

LinkWithin

Related Posts Plugin for WordPress, Blogger...